Google Sheets
Power BI
Power BI

Power BI

Power BI
Google Sheets
Rakenduse seadistamine
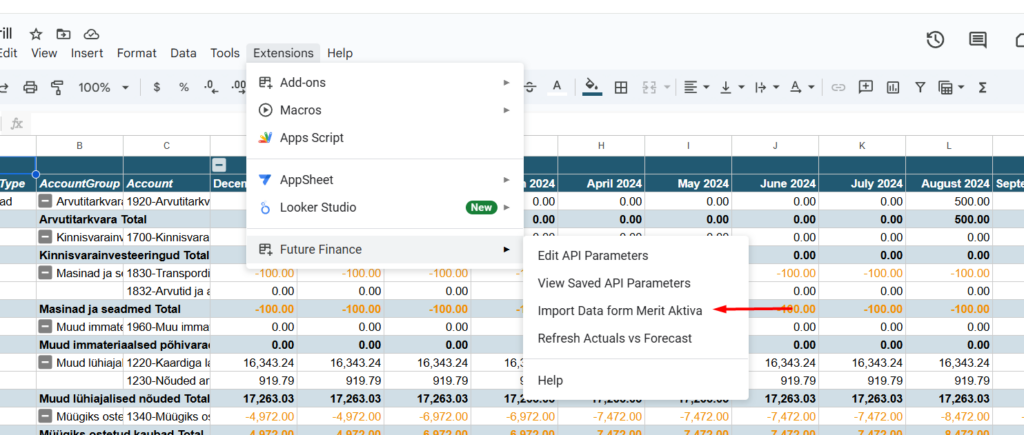
Peale rakenduse alla laadimist ava uus Google Sheets fail. Tab ribalt vali “Extensions” ja Future Finance alt saab API parameetrid sisestada.
-

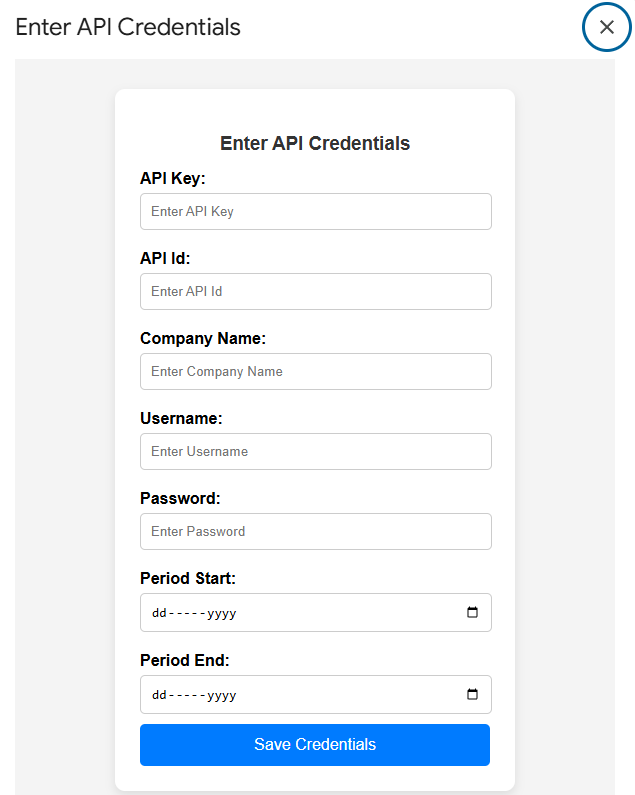
- Sisesta API võtmed Meriti lehelt ja kasutajanimi ning parool, mille oled saanud Future Finance lehelt. Sisesta ka algusaeg, millest alates tahad andmeid näha ning lõpuaeg.
- Kui parameetrid on sisestatud, vali “Import data from Merit Aktiva.”
- Peale andmete laadimist ilmuvad leheküljed “Balance”, “P&L”, “Forecast”, “Actuals vs Forecast”. Ehk info bilansi ja kasumiaruande kohta ning võimalus sisestada prognoos ning seda tegelike tulemustega võrrelda.
- Andmete värskendamiseks vajutage uuesti “Import data from Merit Aktiva.”
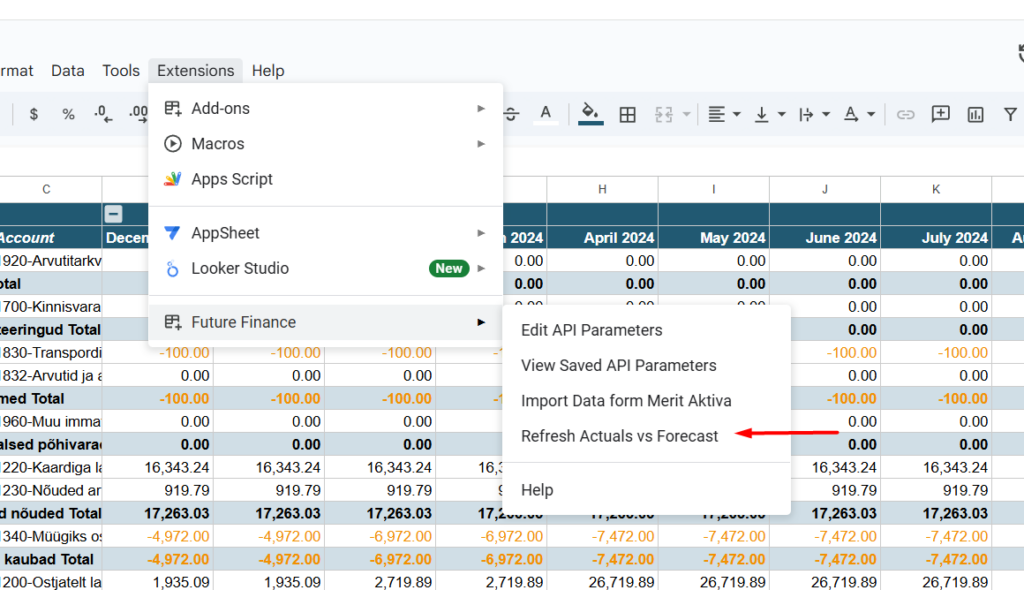
NB! Kui olete ise lisanud lehekülgi, mis ei kasuta andmeid eelpool nimetatud lehtedelt, siis need lehed ei ole värskendamise poolt mõjutatud. Peale prognoosi täitmist vajutage nuppu “Refresh actuals vs Forecast”, siis ilmuvad sisestatud väärtused võrdluslehele.
Power BI
1. Make sure you have a Power BI PRO subscription
2. Get the API and access keys:
- Merit API details from your accountant
3. Purchase the Future Finance subscription
– Sign up on Futurefinance.ee
– Fill in billing information
– On my account page click on “New Dashboard” button 
– Generate credentials and name your dashboard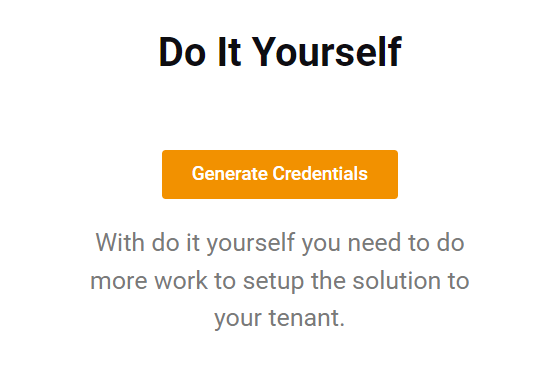
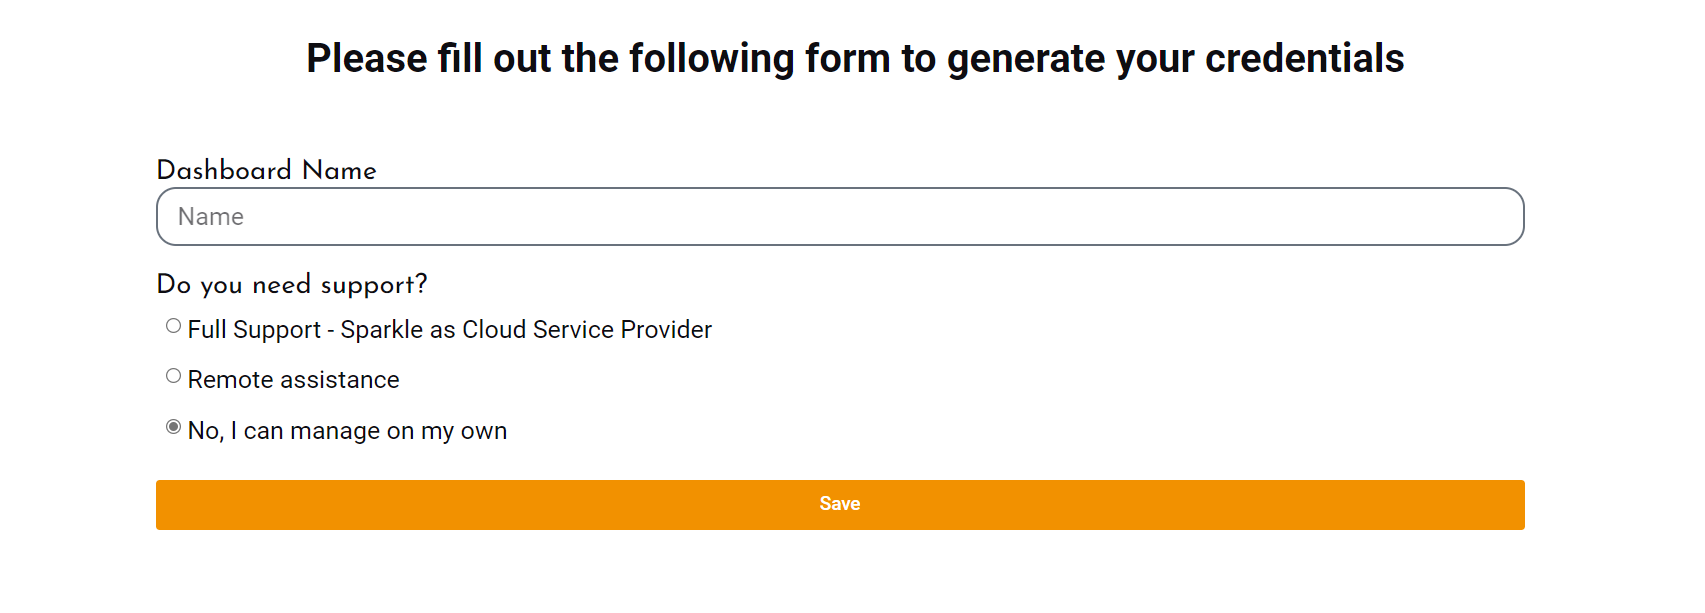
– You can see your username and password by clicking “View Credentials”
– Credentials are needed when connecting an app with your own data.
4. Install the App from the Microsoft AppSource
After this you will already see the reports.
5. To analyze your own data, please enter the connection details

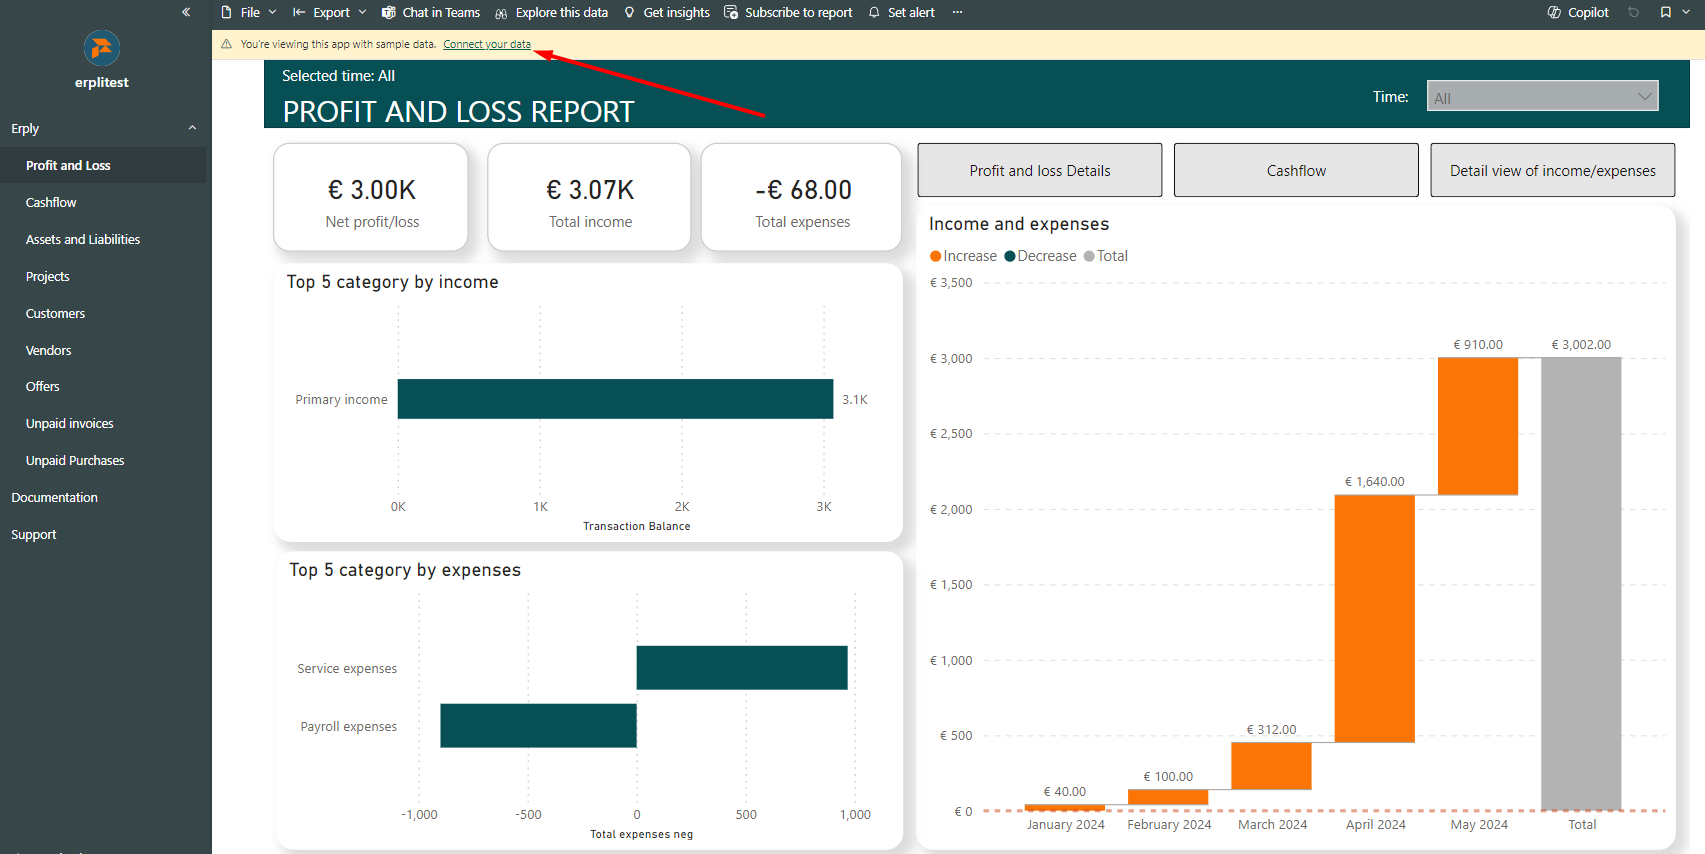
Future Finance with sample data
Click on “Connect your data” to add the credentials.
After clicking on it, you will see a popup:
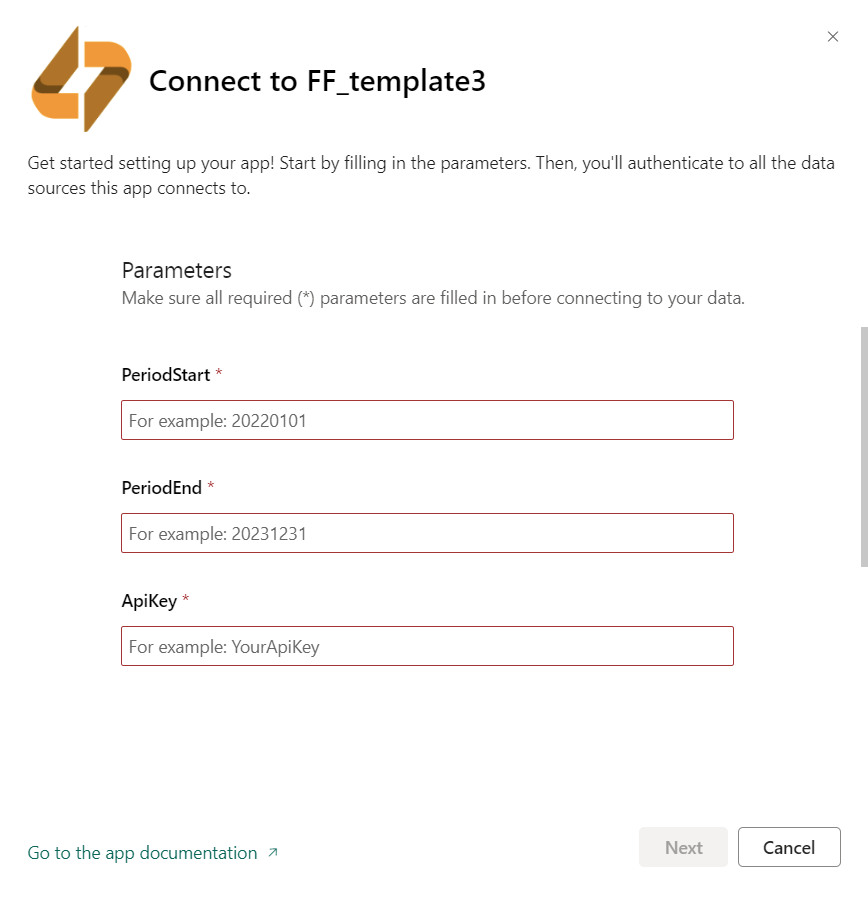
Merit API credentials popup
Enter the Merit API connection details
- What period would you like to analyze?
- Period start: beginning of the analysis, e.g. 1st of January 2022
- Period end: end of the analysis, e.g. 31st of December 2023
- Merit accepts the format: YYYYMMDD, e.g. 20220101 and 20231231
- What period would you like to analyze?
- Merit API details:
- API Key
- API ID
- Optional (for extra visuals): if you use Merit Palk (with Pro-license), then Merit palk API Key and API ID
- Optional (for template budget users): link to your budget file in Google Sheets
- Merit API details:
Click “Next” and you will see the second part of the popup:
Choose “Sign in and continue.” A new pop-up window will appear, allowing you to log in using your Google account
Click “Next” and you will see the third part of the popup:
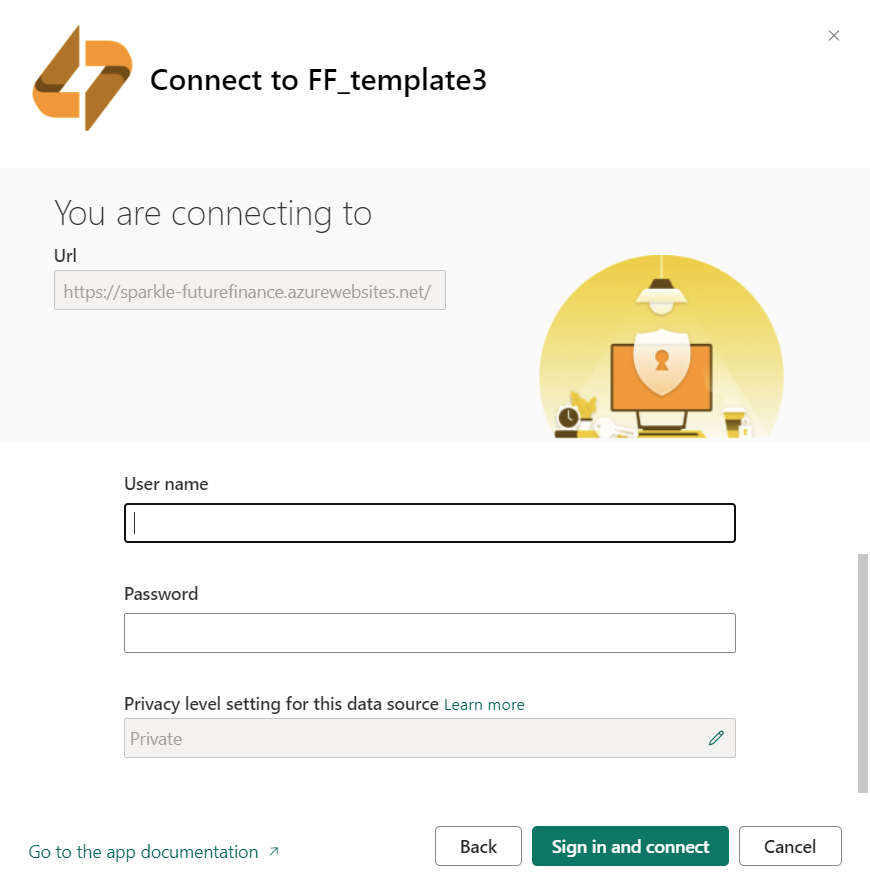
Future Finance subscription details
Enter the Sparkle connection details:
- User name
- Password
“Sign in and connect” to your data!
6. Share with your co-workers!
Power BI
NB! Seoses API piirangutega palun kontakteeruge meiega enne ühenduse loomist.
1. Make sure you have a Power BI PRO subscription
2. Get the API and access keys:
- Smart Accounts API details from your accountant
3. Purchase the Future Finance subscription
4. Install the App from the Microsoft AppSource
After this you will already see the reports.
5. To analyze your own data, please enter the connection details
Click on “Connect your data” to add the credentials.
After clicking on it, you will see a popup:
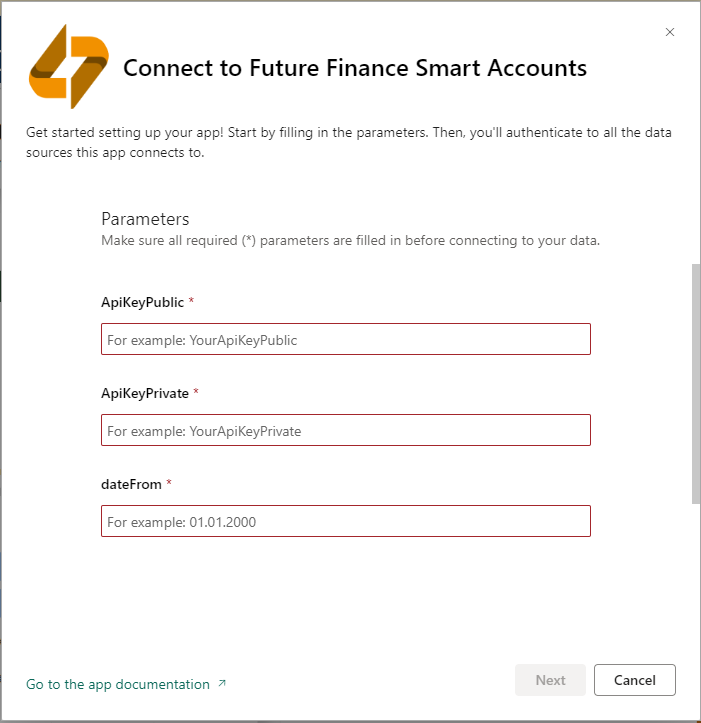
Enter the SmartAccounts API connection details
- What period would you like to analyze?
- dateFrom: beginning of the analysis, e.g. 1st of January 2000
- SmartAccounts accepts the format: DD.MM.YYYY, e.g. 01.01.2000
- What period would you like to analyze?
- SmartAccounts API details:
- API Key
- API ID
- SmartAccounts API details:
Click “Next” and you will see the second part of the popup: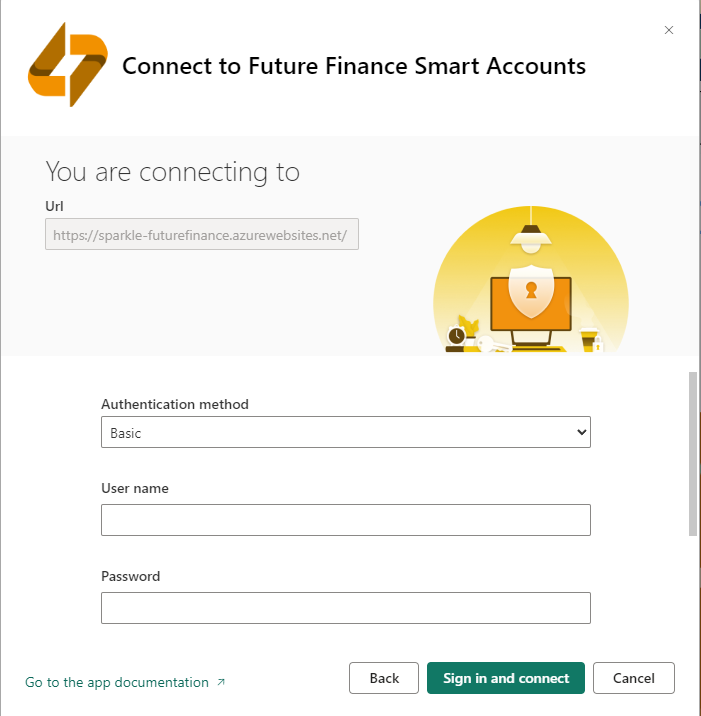
Enter the Sparkle connection details:
- User name
- Password
“Sign in and connect” to your data!
6. Share with your co-workers!
Power BI
1. Make sure you have a Power BI PRO subscription
2. Get the API and access keys:
- ERPLY Books API details from your accountant or from your ERPLY Books account under settings- API settingas – API token.
3. Purchase the Future Finance subscription
– Sign up on Futurefinance.ee
– Fill in billing information
– On my account page click on “New Dashboard” button
– Generate credentials and name your dashboard
– You can see your username and password by clicking “View Credentials”
– Credentials are needed when connecting an app with your own data.
4. Install the App from the Microsoft AppSource
After this you will already see the reports.
5. To analyze your own data, please enter the connection details
Future Finance with sample data
Click on “Connect your data” to add the credentials.
After clicking on it, you will see a popup:
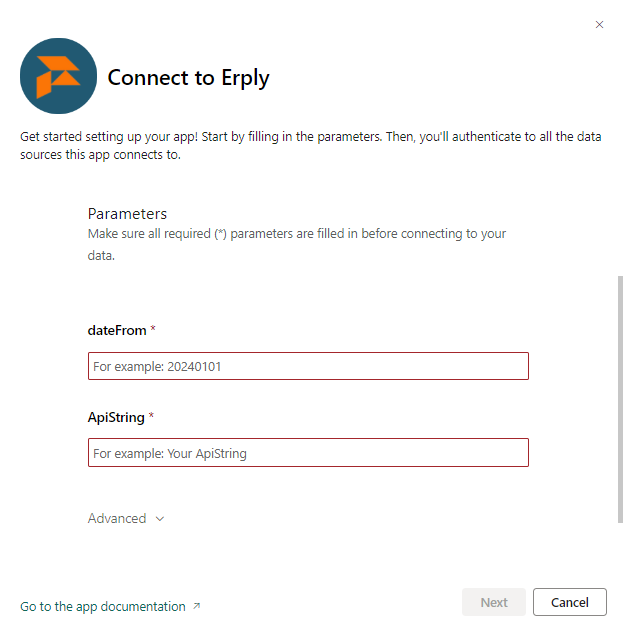
ERPLY Books API credentials popup
Enter the ERPLY Books API connection details
- What period would you like to analyze?
- Period start: beginning of the analysis, e.g. 1st of January 2024
- Erply accepts the format: YYYYMMDD, e.g. 20240101
- What period would you like to analyze?
- ERPLY Books API details:
- API String (API token)
- ERPLY Books API details:
Click “Next” and you will see the second part of the popup: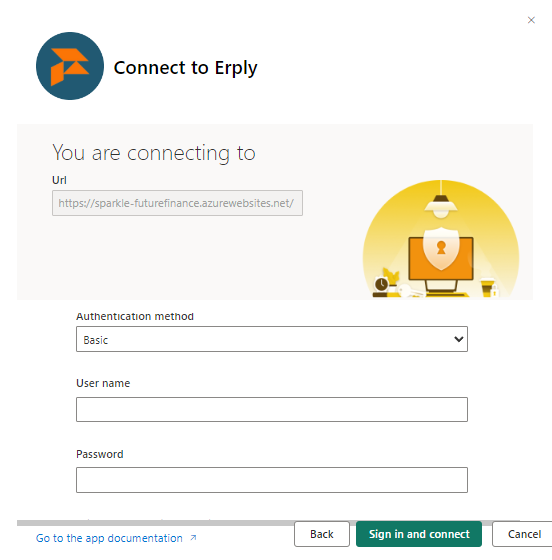
Enter the Sparkle connection details (credentials you created in step 3 on futurefinance.ee):
- User name
- Password
“Sign in and connect” to your data!
6. Share with your co-workers!
Power BI
1. Make sure you have a Power BI PRO subscription
2. Get the API and access keys:
- Standard Books API details from your accountant
3. Purchase the Future Finance subscription
– Sign up on Futurefinance.ee
– Fill in billing information
– On my account page click on “New Dashboard” button
– Generate credentials and name your dashboard
– You can see your username and password by clicking “View Credentials”
– Credentials are needed when connecting an app with your own data.
4. Install the App from the Microsoft AppSource
After this you will already see the reports.
5. To analyze your own data, please enter the connection details

Future Finance with sample data
Click on “Connect your data” to add the credentials.
After clicking on it, you will see a popup:
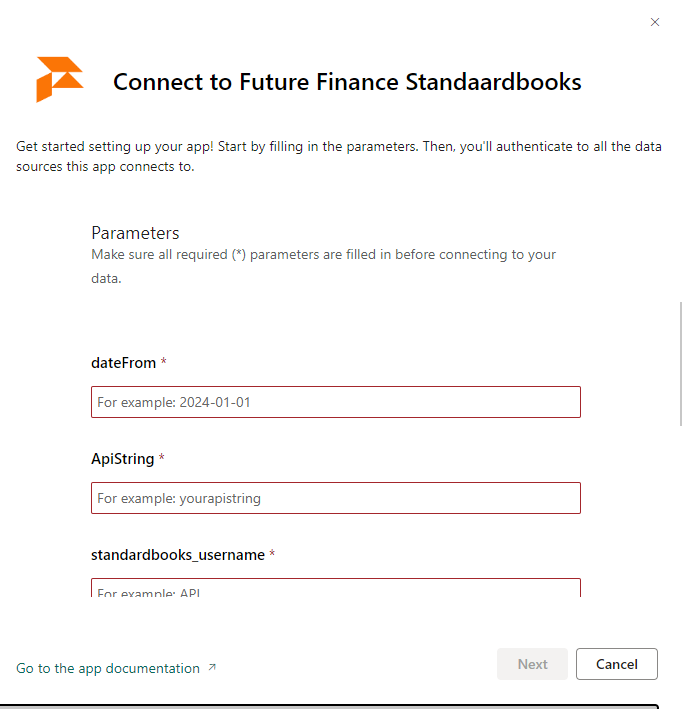
Standard Books API credentials popup
Enter the Standard Books API connection details
- What period would you like to analyze?
- Period start: beginning of the analysis, e.g. 1st of January 2024
- Standard books accepts the format: YYYY-MM-DD, e.g. 2024-01-01
- What period would you like to analyze?
- Standard books API details:
- API String
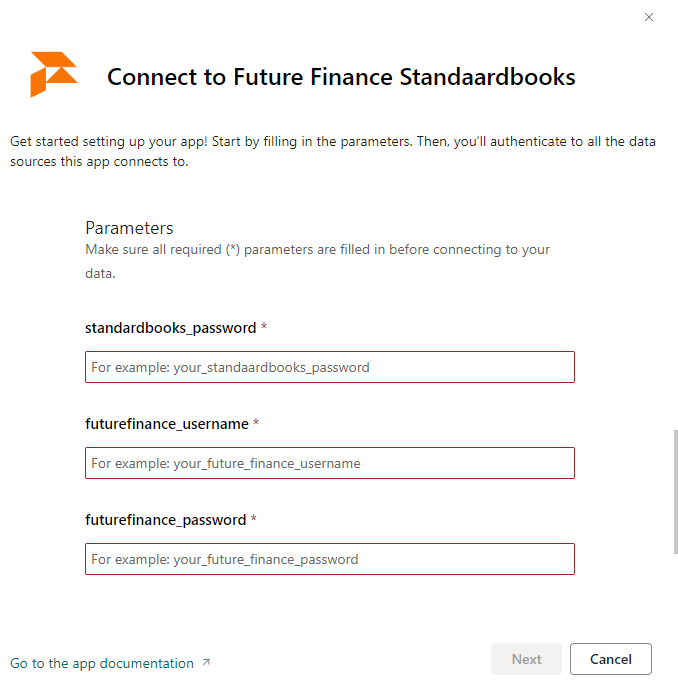
- Standard Books user name
- Standard Books password
- Standard books API details:
Enter the Sparkle connection details(credentials you created in step 3 on futurefinance.ee):
- User name
- Password
Click “Next” and you will see the second part of the popup: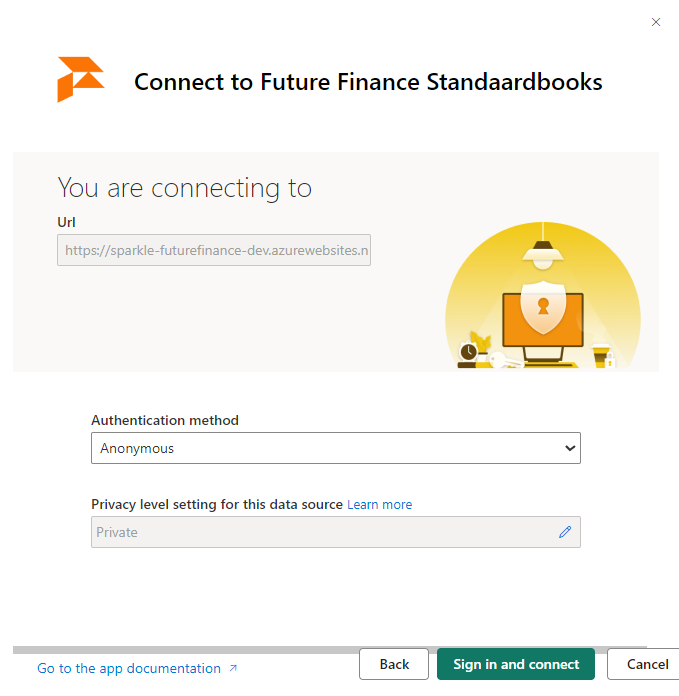
Select “Anonymous” authentication method.
“Sign in and connect” to your data!
6. Share with your co-workers!
If something went wrong

Please check that your company allows installing template apps and then try install the APP again
If the problems still persist, reach out to Sparkle: info@futurefinance.ee